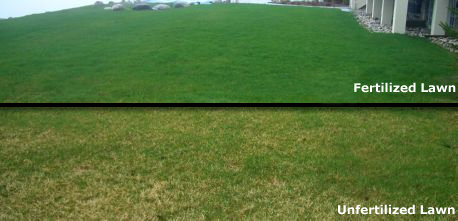
When to Apply Fertilizers
Proper timing of fertilizer applications has a marked effect on the growth of landscape plant materials. In general, the best time to apply fertilizer is in the spring before growth begins. Soil type also affects the timing of fertilizer applications. For sandy or loam soils, apply fertilizer as soil temperatures begin to rise and before growth occurs. For heavy clay soils apply the fertilizer in late fall after leaves have fallen or the plant is completely dormant. The maximum growth response to the fertilizer is obtained if the fertilizer is available in the root zone at or slightly before the start of spring growth. In sandy soils fertilizer moves more rapidly into the root zone, whereas in heavy soils, it takes much longer for the fertilizer to reach the root system. Generally speaking, don’t apply fertilizers from August 1 until late fall (about the time of the average date of the first killing frost). Late summer fertilizing can stimulate an excessive amount of new growth and this tender vegetation can be more susceptible to winter injury.
#greenearthinc #landscapedesign #snowremoval #snowservices #maryland


")